EV charger
Planning an EV-Ready Garage: Charger Placement, Cable Runs, Clearances, and Fitting Storage Around It All
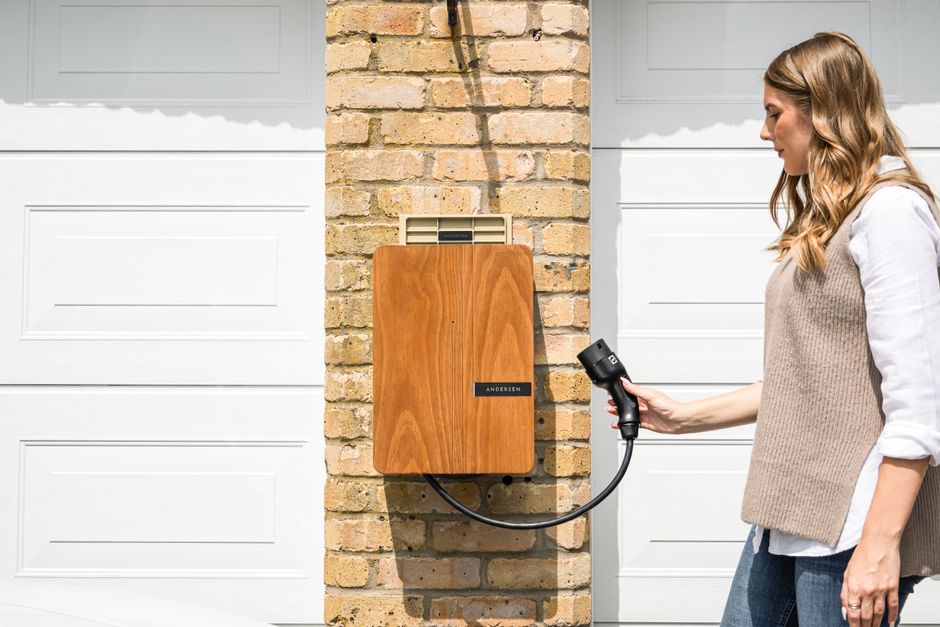
Turning your garage into an EV-ready space means thinking about the charger, the cable run, clearances, and your storage layout all at once, get the sequence wrong and you'll be pulling out freshly installed garage cabinetry before you've had a chance to use it.
Mapping the EV Charger Location and Cable Run Before Any Garage Cabinetry Goes In
The single biggest planning mistake Sydney homeowners make is treating the EV charger as an afterthought, something to bolt to whichever wall has a spare stud once the shelving and cabinetry are already in place. That approach almost always creates problems: a cable run that has to dog-leg around a workbench, a charger wedged into a corner with no elbow room, or a circuit that has to travel twice the necessary distance because the panel-side route is now blocked by a cabinet.
Start instead by marking the charger position on the wall before anything else is measured or ordered. The ideal spot balances three things:
- Proximity to the switchboard: a shorter cable run means less voltage drop, less conduit, and a lower installed cost.
- Reach to the vehicle's charge port: measure where the port sits when the car is parked in your normal position; the tethered cable or Type 2 lead needs to reach it comfortably without stretching across a walkway.
- A clear cable path: licensed electricians running to AS/NZS 3000 will need to chase or surface-run conduit; walls already lined with Decor Cabinets-style floor-to-ceiling units make that far harder and more expensive.
Once the charger position and cable route are confirmed, ideally after a free on-site assessment with your installer: you have a fixed reference point. Every storage cabinet, workbench, and shelf can then be planned around it, not the other way around.
Clearance Rules Every EV-Ready Garage Must Respect Before You Plan Garage Cabinetry
Before a single cabinet gets bolted to the wall, clearance around your EV charger needs to be locked in, and it shapes every storage decision that follows. Getting this wrong means your garage cabinetry ends up blocking access for servicing, tripping a ventilation requirement, or creating a safety hazard that a licensed electrician will flag on inspection.
Minimum Clearances to Work From
- Front access: Allow at least 600 mm of clear space directly in front of the charger unit. This gives you room to plug and unplug comfortably and lets an electrician service the unit without shifting stored items.
- Sides: A minimum 150–200 mm on each side keeps airflow moving around the unit and prevents heat build-up, particularly important in enclosed Sydney garages over summer.
- Above the unit: Keep at least 300 mm clear above the charger housing. Overhead shelving or wall-mounted cabinetry installed too close can restrict heat dissipation and interfere with cable routing.
- Below the unit: Mount the charger so the bottom of the unit sits no lower than 400–500 mm from the finished floor, protecting it from water ingress and incidental contact.
Why These Clearances Also Affect Cable Runs
The conduit or cable run feeding your charger, typically routed from the switchboard through the wall cavity or along the garage wall, needs its own clear path that doesn't compete with cabinetry fixings or shelf brackets. Trunking runs should be mapped out before cabinetry positions are finalised, not after.
As a practical rule: treat the charger and its cable run as fixed infrastructure first, then design your storage layout around that footprint. Every AS/NZS 3000-compliant installation our team completes in Sydney follows this sequence, and it saves homeowners from costly cabinet relocations down the track.
Designing Garage Cabinetry Around Your Charger Without Blocking Access
Once your EV charger is mounted and the cable run is locked in, the next challenge is fitting out your garage cabinetry without compromising safe, comfortable access to the unit. Getting this sequencing right matters, cabinetry that crowds the charger not only creates a daily frustration but can create genuine safety issues if you can't easily plug in, read the status indicators, or reach the emergency isolation switch.
Plan Your Cabinet Layout After the Charger Position Is Fixed
The golden rule is simple: the charger position drives the cabinetry layout, not the other way around. Before ordering any wall-mounted cabinets or steel cupboards, mark out the charger's footprint on the wall and floor, including:
- A minimum 600 mm clear zone on each side of the charger face for cable plug-in and removal
- 300 mm clearance above the unit so heat can dissipate freely
- A clear floor path of at least 900 mm in front of the charger, unobstructed by base cabinets or workbenches
With those exclusion zones defined on the wall, you can confidently plan modular storage systems around them. Tall pantry-style cabinets work well on the adjacent wall, while wall-hung upper cabinets can sit either side of the charger, provided they don't creep into those side clearances.
Workbenches and Base Cabinets: Where They Fit
A continuous workbench run directly beneath a wall-mounted charger is a common mistake. Instead, leave a deliberate gap in the bench run below the charger and resume cabinetry on either side. This keeps the area uncluttered and lets the EV cable hang naturally without snagging on a bench edge.
If you're unsure how the charger unit's dimensions will interact with your planned layout, our charger types page shows footprint and clearance specs for the models we install, and you can always browse our installation gallery to see how Sydney homeowners have integrated storage around their units.
Workbench Placement That Works With Your Charging Setup
Getting your garage cabinetry and workbench layout right isn't just about storage: it's about making sure neither one compromises your EV charger installation. In a Sydney garage, where space is often at a premium, a poorly positioned workbench can block charger access, obstruct your cable run, or even create a tripping hazard when you're plugging in at the end of a long commute.
Position the Bench Away From the Charger's Service Side
Your electrician needs clear access to the charger's front face and, in many cases, to the conduit entry point below or above the unit. As a practical rule:
- Keep at least 600 mm clear in front of the charger at all times, don't let a workbench edge creep into that zone
- Run benches along the opposite or adjacent wall to the charger where possible, so work activity and tool storage don't interfere with the charging bay
- Avoid overhead shelving directly above the charger: items falling or being knocked loose can damage the unit or its cable
Garage Cabinetry That Supports: Not Fights: Your Charger
Wall-hung cabinetry is generally the smarter choice in an EV-ready garage. It keeps the floor clear for the car, allows cable conduits to run neatly behind or between cabinet runs, and makes it far easier to adapt the layout later if you upgrade to a higher-output charger. For a detailed look at how to budget and sequence a full fitout (including bench heights, cabinet depths, and typical EV charger rough-in costs) the planning guide from Brennan Cabinetry on garage fitout cabinetry and workbenches is worth a read before you commit to any layout.
Plan the bench and cabinet layout after your charger position is confirmed, not before. That sequence alone saves most Sydney homeowners a costly rework.
Pulling the Full Layout Together: Garage Cabinetry, Safety, and Daily Usability
Once your charger position and cable route are locked in, the final step is fitting garage cabinetry and workbenches into the remaining space in a way that genuinely supports daily life, not just looks organised on a plan. The goal is a garage where you can park, plug in, grab tools, and leave without navigating obstacles or worrying about cable damage.
A Practical Checklist Before You Finalise the Layout
- Charger clearances first, cabinetry second. Confirm your 300–500 mm side clearances and unobstructed front access zone before a single cabinet is positioned.
- Route cables before walls are clad. Conduit runs are far cheaper to install during a fit-out than after cabinetry is fixed in place.
- Keep flammables away from the charger. Aerosols, solvents, and petrol cans belong in a ventilated, dedicated section of cabinetry, ideally on the opposite wall to the EVSE unit.
- Label your switchboard circuit. It sounds simple, but a clearly labelled EV circuit saves time for you and for any electrician who works on the board later.
- Test the parking position before committing to shelving heights. Park your vehicle, open every door, then mark out shelf and cabinet footprints with tape on the floor.
Wall-mounted steel cabinetry above bench height is the most space-efficient option in a tight double garage: it keeps the floor clear for parking and the charger's cable swing zone unobstructed. Overhead storage works well for seasonal or rarely used items, keeping the eye-level zone free for daily access.
Bringing all of these elements together (charger placement, compliant cable runs, proper clearances, and well-planned garage cabinetry) transforms a standard garage into a space that works as hard as your EV does. If you're planning a new installation or retrofitting an existing garage in Greater Sydney, an on-site assessment with a licensed electrician is the fastest way to get a layout that's safe, practical, and built to AS/NZS 3000 from day one.
Related services
Related EV charging guides
Written by Nathan Dawson
Founder & Lead EV Installer. More about Nathan.